Skip to content

In this guide, we will go through how to create and edit resources, which we call “other resources”, in the MyDesk app. It is important to mention that you need to be an administrator of MyDesk to be able to manage other resources.
Step 1: Log in to MyDesk
The first step is to log in to your MyDesk account in a browser, which is https://firmanavn.mydesk.dk. This will take you to MyDesk administration, where you can start creating and managing other resources.
Step 2: Go to administration
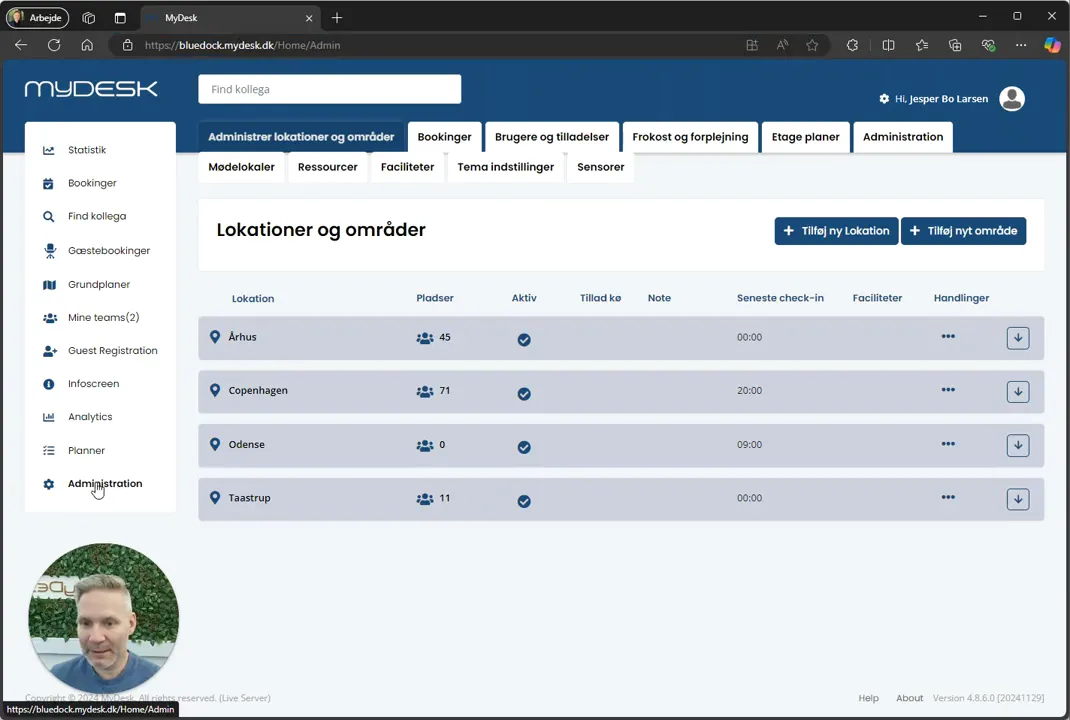
Once you are logged in, find the administration area. Here you will see an item called “Administration”. Click on this item.
Step 3: Create resource types
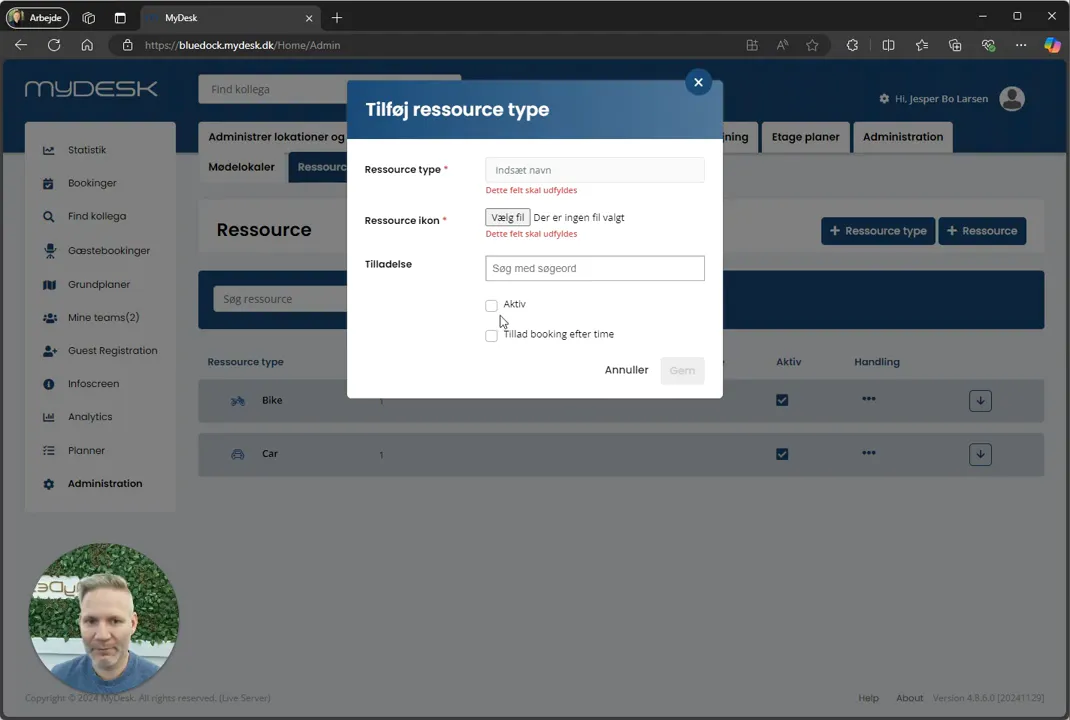
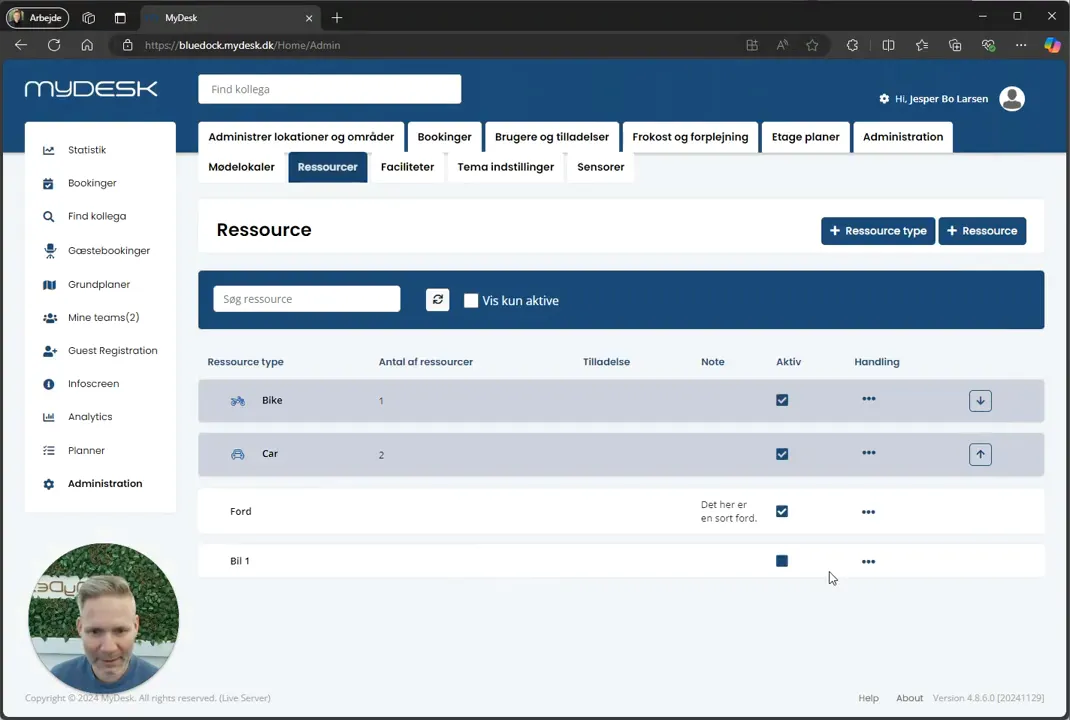
In the administration area you will find a section for resource types. These are the categories that your resources will fall under. You will see existing types like “Bike” and “Cars”. To create your own resource types, click “+Ressourctype”.
Step 4: Upload icon and enter details
When you create a new resource type, you can upload an icon, enter a name and choose whether it should be active. You can also choose to allow “booking by the hour” instead of all-day booking. If you don’t enable this option, booking will be done for the whole day.
Step 5: Create a new resource
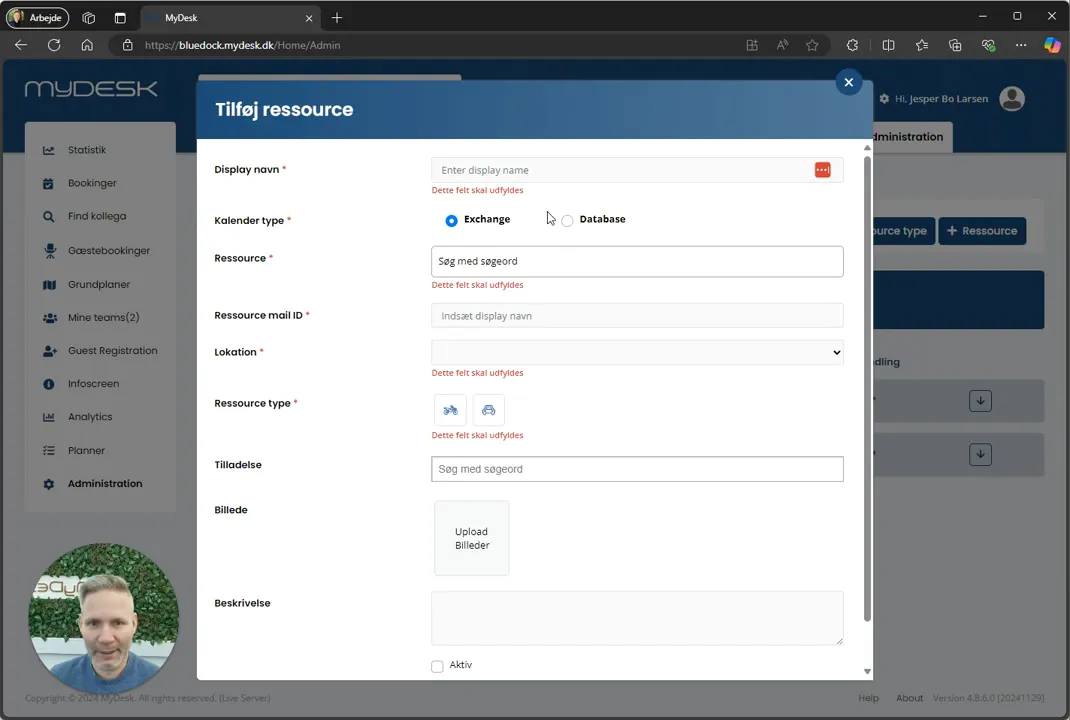
Once you have created resource types, you can start adding specific resources. Click “+ Resource” to start this process. You will have the option to choose between two types of resources: Exchange resources and database resources.
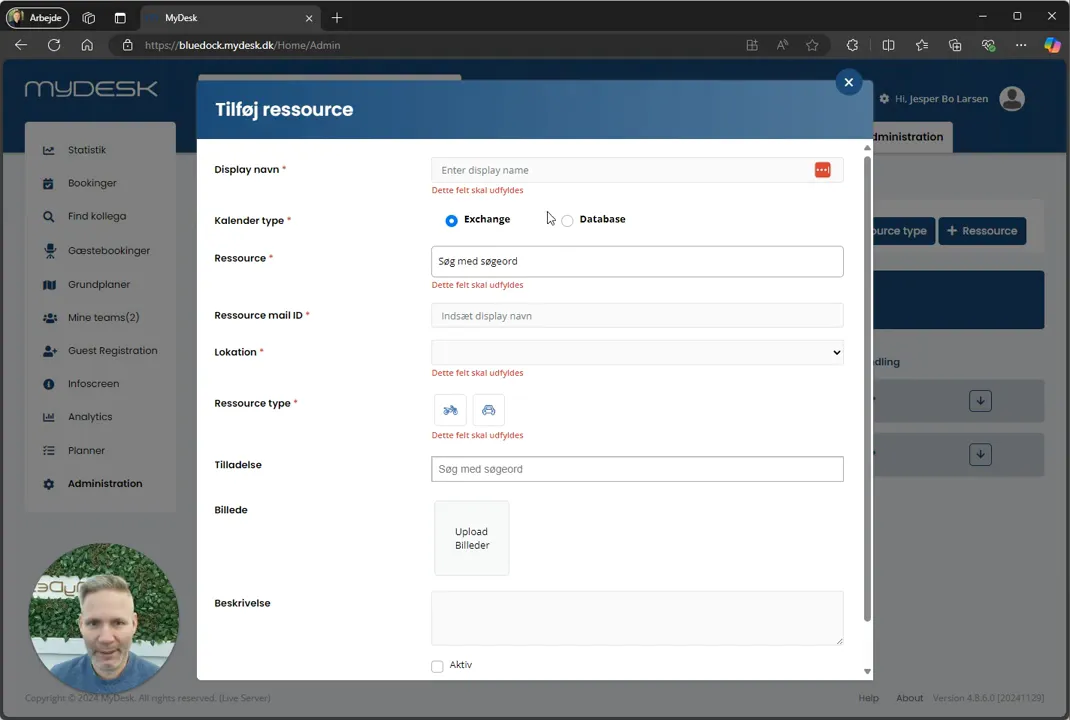
Exchange Resources vs. Database Resources
Exchange resources require a resource to be created in Exchange so you can see the bookings. Database resources only live in MyDesk. It is recommended to create an Exchange resource as it provides a better integration with Outlook.
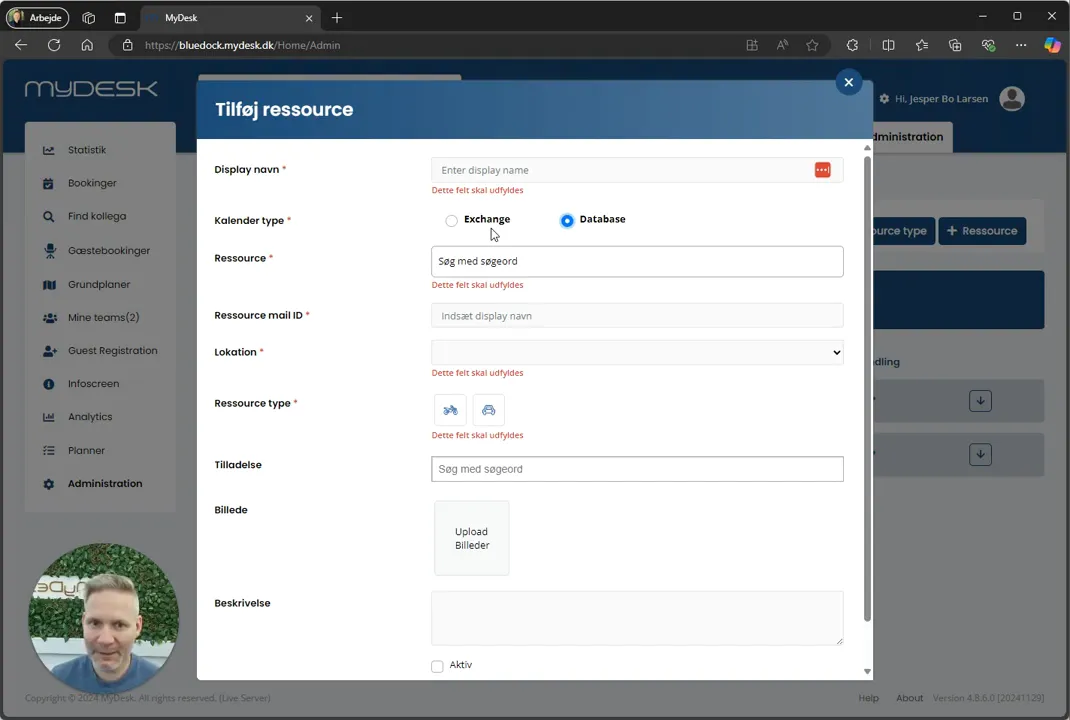
Step 6: Enter the resource details
When you create a resource, you need to select which location the resource is associated with. For example, if the resource is a car, you can select “Copenhagen” as the location. Then give the resource a name and optionally select a relevant image.
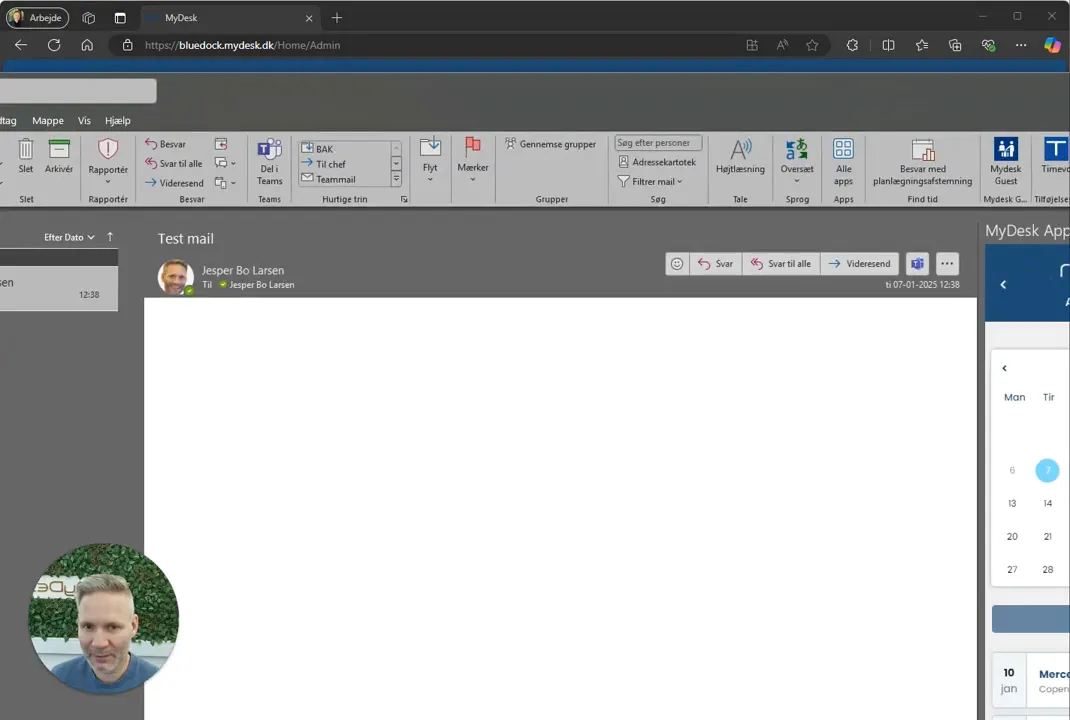
Step 7: Activate the resource
It is important to indicate that the resource is active. Once this is done, the resource will be available in your Outlook app and mobile app as a bookable resource.
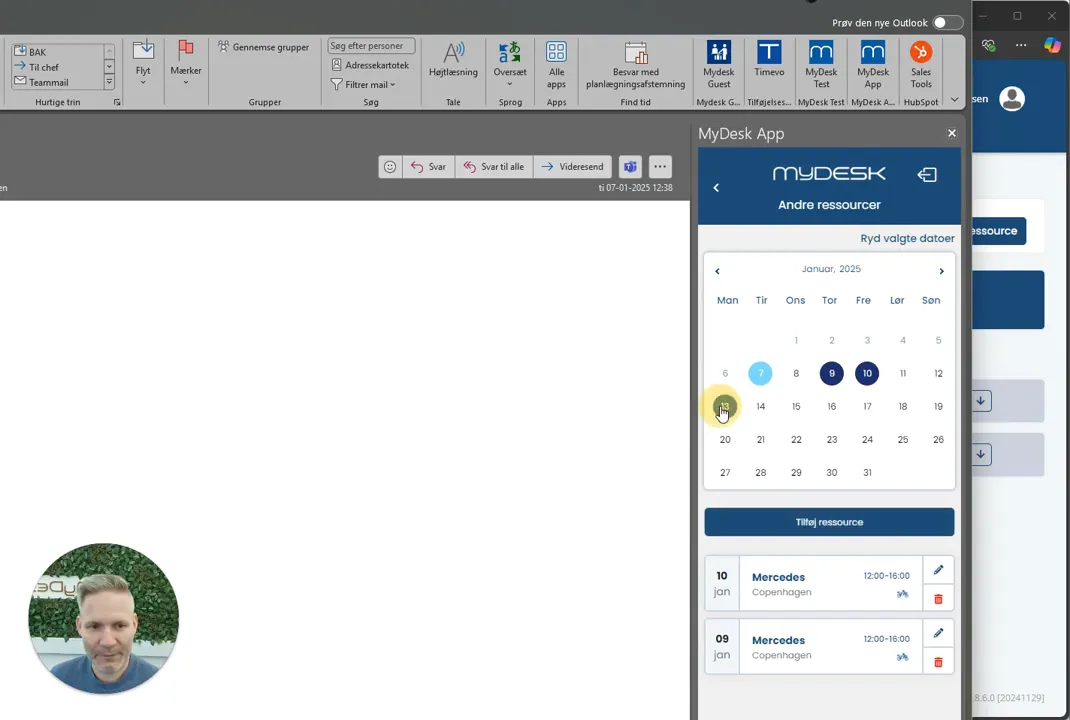
Step 8: Check availability
Once the resource is created and activated, you can search for it in Outlook. You may need to open and close Outlook to update the resource list.
Step 9: Book the resource
Once everything is set up, you can now book the resource in your Outlook app, mobile app and Teams app.
Completion
Creating and managing resources in MyDesk is a simple process as long as you follow these steps. Remember to make sure all resources are properly enabled to ensure they are visible to users.